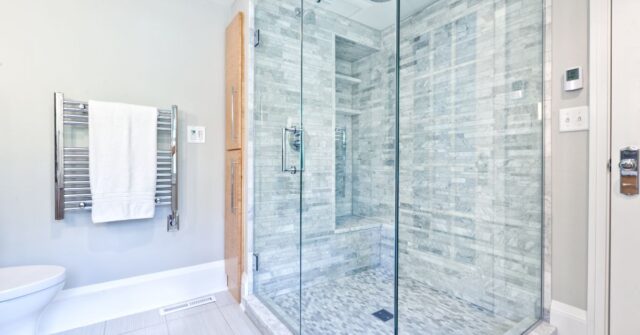
Tiling a bathroom might seem like a daunting task at first glance, but with the right knowledge, tools, and a bit of patience, it’s a rewarding project you can handle yourself.
This guide provides clear, step-by-step instructions to help you transform your bathroom into a masterpiece.
Tools and Materials You’ll Need
Before diving in, it’s important to gather all the tools and materials required for a smooth and efficient tiling process.
Proper preparation can save you from unnecessary hiccups later on and make the job much easier.
Essential Tools for Tiling
Having the right tools on hand can make or break your tiling project. Here’s a list of essentials:
- Tile cutter or wet saw for precise cuts
- Notched trowel for spreading adhesive
- Tile spacers to ensure even gaps
- Spirit level for maintaining alignment
- Grout float for applying grout
- Sponge and bucket for cleaning excess grout
- Measuring tape and pencil for accurate planning
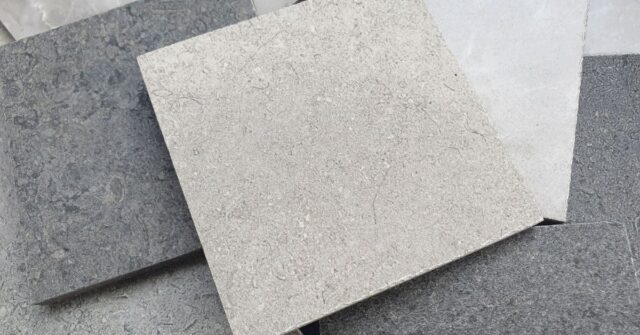
Choosing the Right Tiles
Tiles come in all shapes, sizes, and materials, so choosing the right ones for your bathroom is essential.
Porcelain tiles are a popular choice due to their durability and water resistance, while ceramic tiles offer a more affordable option with plenty of style choices.
For floors, opt for slip-resistant tiles to enhance safety.

Adhesives, Grouts, and Sealants
The products you use to hold and finish your tiles are just as important as the tiles themselves. A waterproof adhesive is crucial in wet areas to prevent moisture from seeping through.
Choose a grout colour that complements your tiles and consider using a sealant to protect against stains and wear over time.
Preparation: Setting the Foundation for Success
Good preparation is the cornerstone of any successful tiling project. Skipping this step can lead to uneven tiles, poor adhesion, or water damage.
Take the time to prepare your walls and floors thoroughly for a polished result.
Inspecting and Preparing the Walls and Floors
Start by inspecting the surfaces you plan to tile. Walls and floors should be clean, dry, and structurally sound. Remove any old tiles, paint, or wallpaper, and fill in cracks or holes with filler or plaster.
Uneven surfaces can be levelled with a self-levelling compound for floors or a skim coat for walls.
Cleaning and Leveling Surfaces
Dirty or uneven surfaces are the enemy of good tiling. Wipe down walls and floors with a damp cloth to remove dust and debris.
For stubborn grime, use a mild detergent and scrub lightly. Ensure the surface is completely dry before proceeding to the next step.
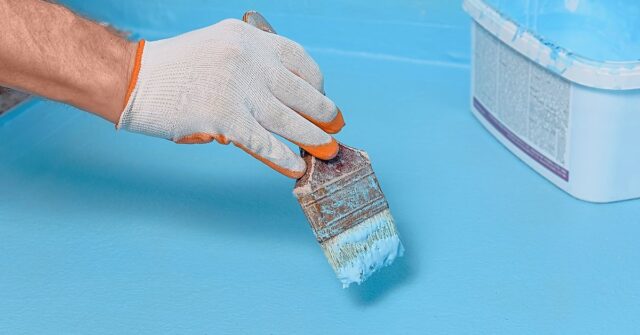
Waterproofing Tips and Techniques
Bathrooms are wet zones, so waterproofing is non-negotiable. Apply a waterproof membrane or sealant to areas exposed to water, such as around the shower, bathtub, or sink.
Allow it to dry fully before moving on to tiling.
Planning Your Tile Layout
Planning your layout in advance prevents headaches later. A well-planned layout ensures your tiles are evenly spaced and symmetrical, avoiding awkward gaps or slivers of tile at the edges.
Measuring and Marking the Center
Find the centre of your wall or floor to start your layout. Measure the width and height of the area and mark the midpoint with a pencil.
This central point acts as your guide, helping you lay tiles in a balanced and symmetrical manner.
Creating a Layout Plan
Before applying adhesive, do a dry run of your tile layout. Place tiles on the surface to see how they will fit, adjusting as needed.
Pay special attention to edges and corners, where tiles may need to be cut. This step ensures you won’t be caught off guard during installation.
Step-by-Step Guide to Tiling a Bathroom
With preparation complete, it’s time to start tiling. Follow these steps to achieve professional-looking results.
How to Tile Bathroom Walls
Tiling walls first prevents adhesive from dripping onto finished floors. Here’s how to tackle wall tiling effectively:
Applying Tile Adhesive
Using a notched trowel, spread the adhesive evenly over a small section of the wall. Work in manageable areas to prevent the adhesive from drying out before you can place the tiles.
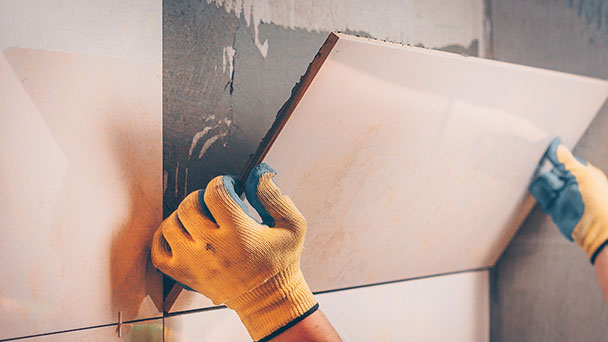
Laying the First Row of Tiles
Start at the centre point you marked earlier and work outward. Place the first tile, pressing firmly into the adhesive. Use tile spacers to maintain even gaps between tiles.
Working Around Fixtures and Obstacles
Bathrooms often have pipes, light switches, and other obstacles. Use a tile cutter or nippers to trim tiles to fit snugly around these fixtures.
Cutting Tiles to Fit
Measure and mark the tiles that need trimming then cut them carefully with a tile cutter or wet saw. Take your time to avoid chipping or breaking tiles.
Ensuring Even Spacing and Alignment
Check your tiles frequently with a spirit level to ensure they’re straight and even. Adjust as needed before the adhesive sets.
How to Tile Bathroom Floors
Floor tiling follows a similar process to walls, with a few key differences to accommodate foot traffic and weight.
Preparing the Subfloor
Ensure the subfloor is clean, dry, and level. If tiling over concrete, check for cracks and repair them with a suitable filler.
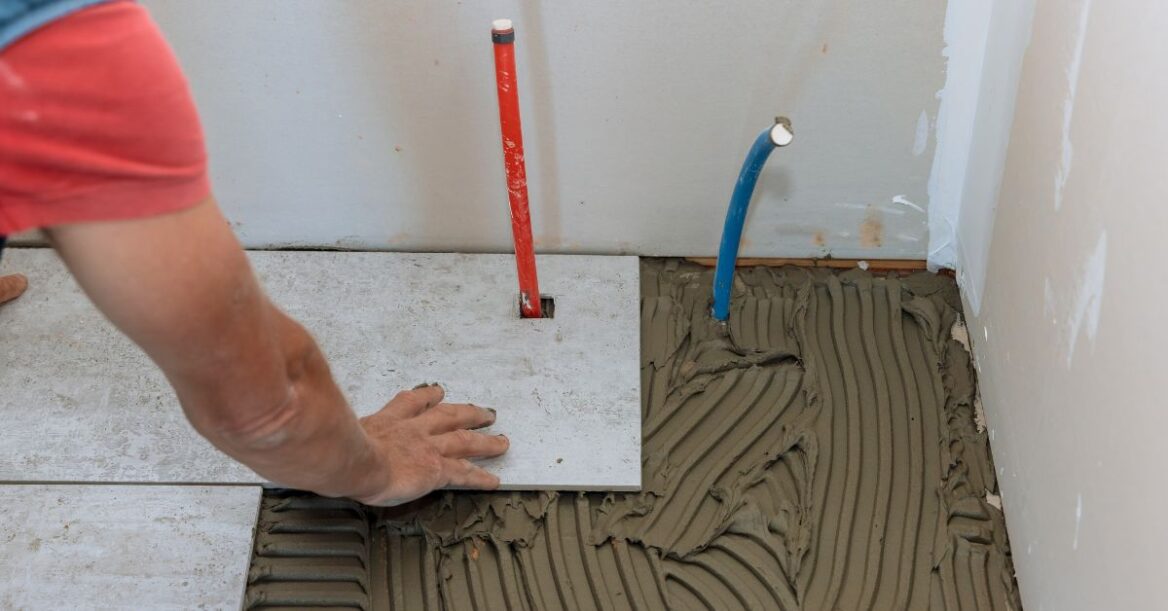
Spreading Adhesive on the Floor
Apply adhesive in small sections using a notched trowel. Spread it evenly to provide a strong base for the tiles.
Laying Floor Tiles
Begin at the centre and work outward. Place tiles carefully, pressing them into the adhesive. Use spacers to maintain even gaps.
Maintaining a Level Surface
Check frequently with a spirit level to ensure your tiles are flat and even. Adjust tiles before the adhesive sets if necessary.
Handling Edges and Corners
Cut tiles to fit snugly along edges and corners, ensuring a seamless look. Use a tile cutter or wet saw for precise cuts.
Grouting and Finishing
Grouting and sealing complete the tiling process, giving your bathroom a polished and professional look.
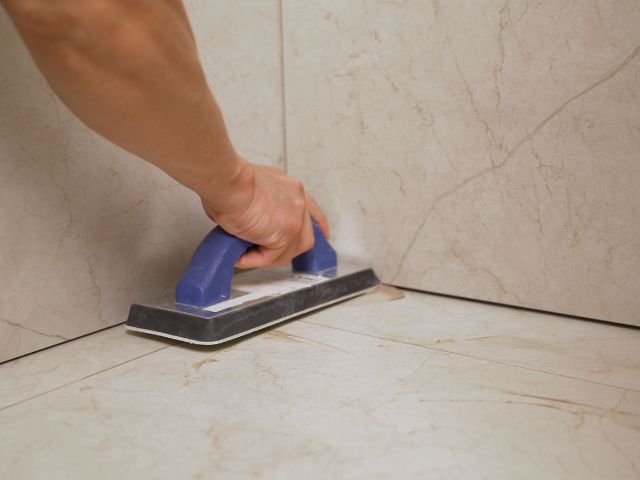
Applying Grout to Tiles
Mix the grout according to the manufacturer’s instructions and apply it using a grout float. Work the grout into the gaps between tiles, removing excess as you go.
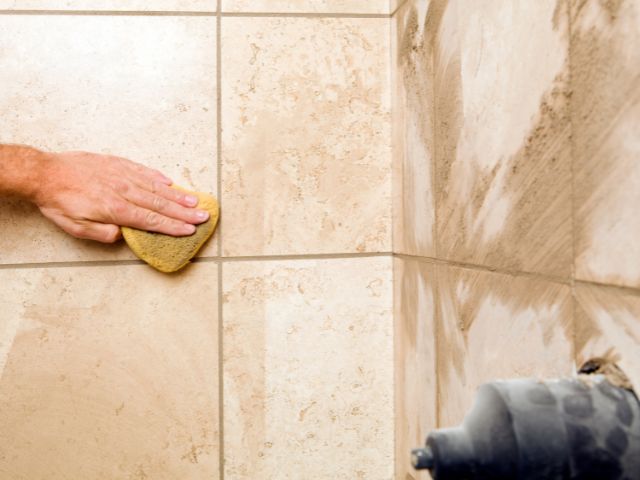
Cleaning Excess Grout
Use a damp sponge to wipe away excess grout before it hardens. Rinse the sponge frequently to keep it clean and effective.
Sealing for Long-Lasting Results
Once the grout is dry, apply a sealant to protect it from moisture and stains. This step helps your tiles maintain their appearance and durability over time.
Professional Tips for a Perfect Finish
Even the smallest details can make a big difference in the final result. Here are some expert tips to help you achieve a flawless finish:
Common Mistakes to Avoid
Avoid common pitfalls like rushing, skipping preparation, or using too much adhesive. Taking your time leads to better results.
How to Achieve Symmetry and Balance
Plan your layout carefully and double-check measurements to ensure your tiles are evenly distributed and visually pleasing.
Tips for Speed and Efficiency
Organize your workspace and tools before starting. Work in small sections to maintain focus and control throughout the process.
Maintaining Your Tiled Bathroom
Once your bathroom is beautifully tiled, proper maintenance will keep it looking fresh for years to come.
Cleaning and Caring for Tiles
Clean your tiles regularly with a mild detergent and soft cloth. Avoid harsh chemicals that can damage the surface or grout.
Preventing Mould and Mildew
Keep your bathroom ventilated to reduce moisture buildup. Consider using a grout sealer with antimicrobial properties for extra protection.
When to Reseal Your Tiles
Reseal tiles and grout every few years to maintain their water resistance and appearance. Follow the manufacturer’s guidelines for the best results.
FAQs About Tiling a Bathroom
Here are answers to some common questions to help you feel confident in your tiling project:
What Are the Best Tiles for Bathrooms?
Porcelain and ceramic tiles are ideal for bathrooms due to their durability and water resistance. For added safety, choose slip-resistant tiles for floors.
Can I Tile Over Existing Tiles?
Yes, but only if the existing tiles are in good condition and firmly attached. Clean and sand them before applying a bonding primer and adhesive.
How Long Does Tiling a Bathroom Take?
The timeline depends on the size of the bathroom and your experience. Most DIY projects take a few days, including preparation and drying time.
Do I Need to Hire a Professional?
While tiling can be a DIY-friendly project, hiring a professional ensures precision and saves time, especially for complex layouts or large spaces.
Conclusion
Tiling a bathroom is a rewarding project that transforms your space into something beautiful and functional. By following this guide, you’ll have the confidence to tackle walls and floors like a pro.
If you prefer expert assistance, NuDesign Bathroom Renovations is here to help. Contact us today to bring your dream bathroom to life.